Plantation Shutter For Sliding Doors

Timber shutters doors and panels

Transform Your Space with Stylish Plantation Shutter Doors - Contact us now.

Elevate your home aesthetics with our premium plantation shutters designed for every style and budget. Experience the perfect blend of functionality and elegance that enhances your living space while providing privacy and light control. Our shutters are easy to install and maintain, making them a smart choice for any homeowner. Discover the difference that quality craftsmanship can make in your home today. Plantation Shutters for doors and partitions have never been easier to install.

Plantation Shutter Sliding Doors: Privacy and Light Control

Plantation shutters offer an excellent solution for managing privacy and light through patio doors. When selecting shutters for these areas, ease of movement, material quality, simplicity, and custom 2pac colour are key considerations.

Ease of Movement and Good Design

  • Effortless Sliding: DIYShutters’ timber plantation shutters are designed for easy use.
  • Lightweight Material: Timber is significantly lighter than PVC (one-third the weight of solid PVC and two-thirds the weight of foamed PVC) and aluminium (40% of the weight of hollow aluminium shutters), making panels easy to slide.
  • Robust Overhead Track: Panels are suspended from a strong overhead track, ensuring smooth operation.
  • No Floor Track: Unlike many imported Chinese systems, DIYShutters eliminates the need for a cumbersome floor track, thus preventing dirt accumulation and tripping hazards. A hidden fin guides the panel instead.
  • No Boxing in: Typical of imported PVC or timber shutter door systems is that they are installed with a timber ‘box’ that closes the panels in on all four sides. This makes the system look overbearing and cumbersome. DIYShutters sliding door shutters are minimal with an attractive pelmet with returns. It is simply a more elegant design.
  • No Mid Rail. Through smart engineering, the panel is stable without a Mid Rail, providing a clean see-through design. This is not possible with PVC.
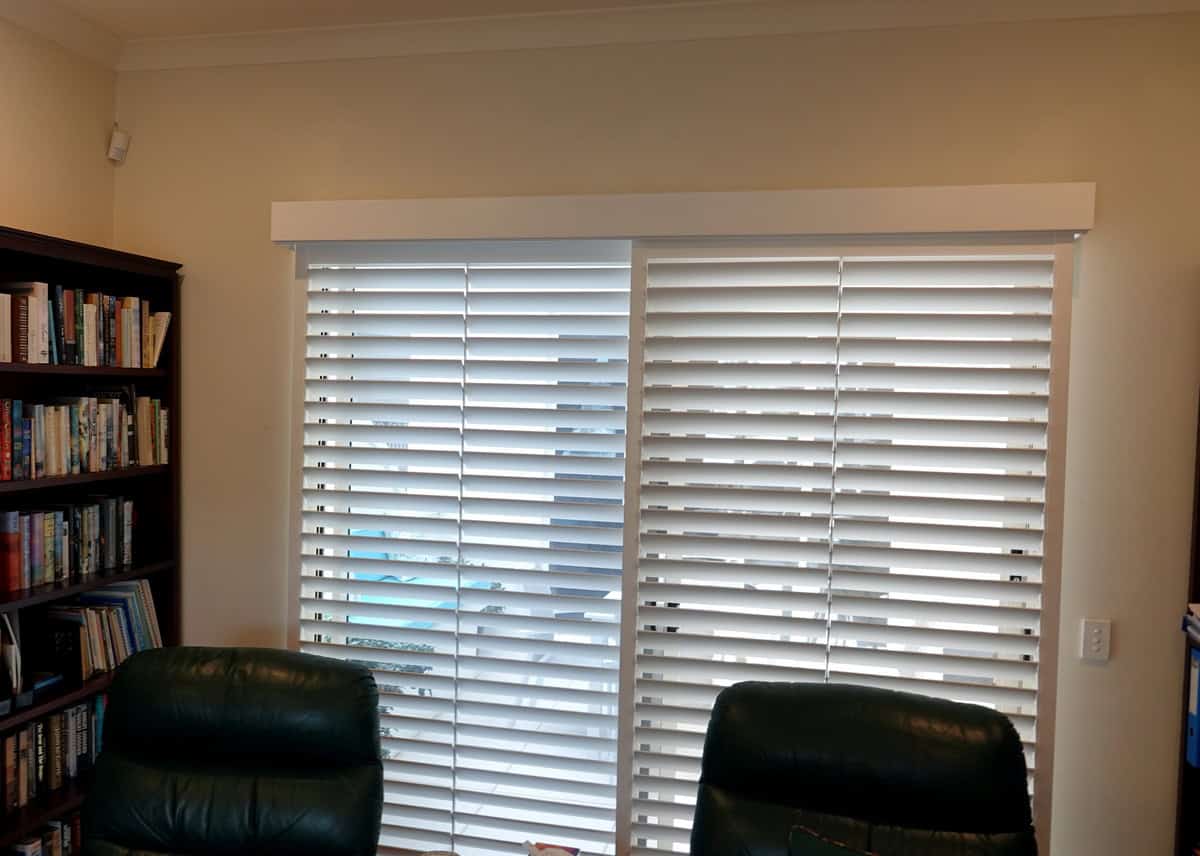
  • One Control Rod – good closure: Precise manufacturing means one control rod can be used to set the angle of all louvres at once. Again , this is not possible with PVC, because aluminium Control Rod expansion and plastic are an expansion mis-match. The louvres would not close fully so the panel in photo if it were PVC, would be divided into three sections, two above the Mid Rail and the one below.
Shutter Sliding Door
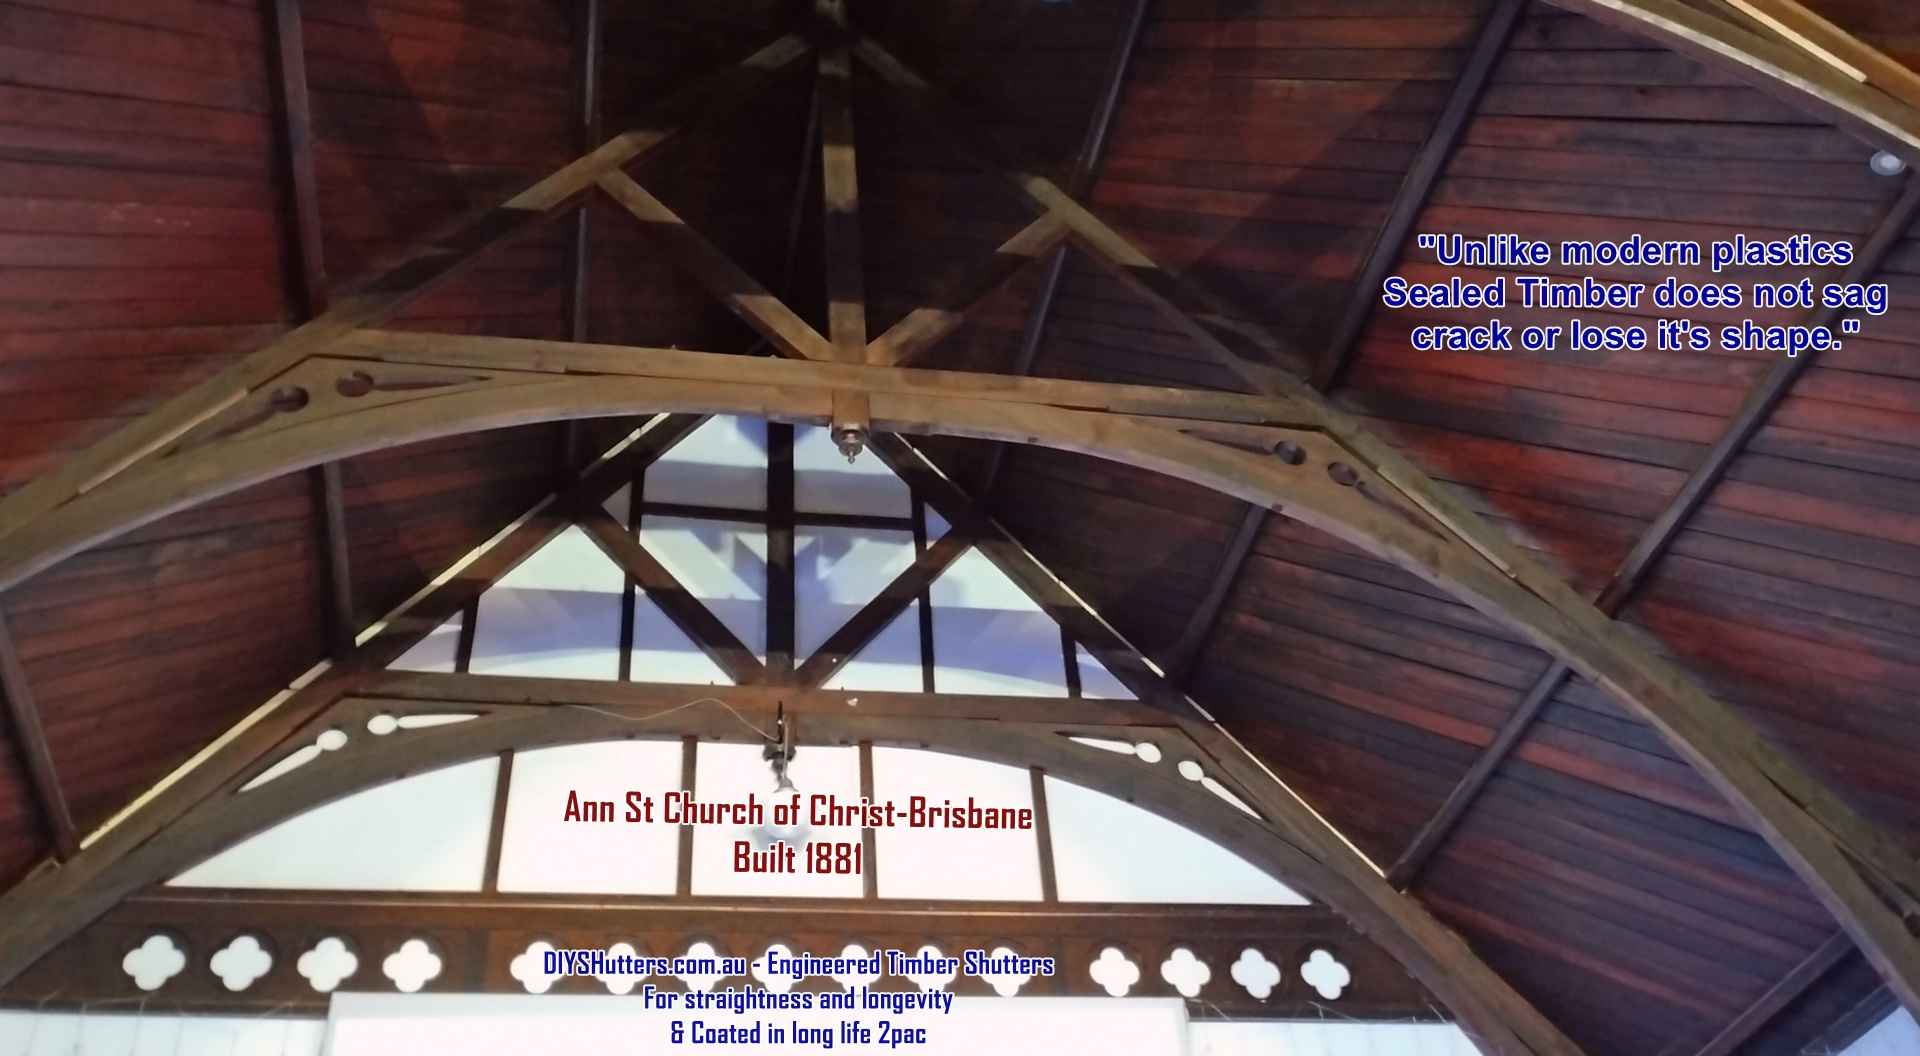
Stable 150 year old timber
Sag in PVC Shutters after 10 years

Material Advantages: Timber vs. PVC

  • Superior Aesthetics: Timber plantation shutter sliding doors inherently offer a more elegant appearance.
  • Wider Panels:
    • PVC Limitations: PVC shutter panels are typically limited to a width of up to 750 mm. Exceeding this often requires joining two panels, resulting in a bulkier look or potentially sagging louvres due to heat and weight if the width limit is exceeded (as some suppliers will supply without notifying the customer). Even high quality PVC, more expensive than timber shutters, has a limited life of 15 years and cannot be re-painted due to UV degradation.
    • Timber’s Advantage: DIYShutters’ timber panels can be up to 1050 mm wide, providing a more expansive view.
  • Engineered Timber Benefits: Wood is a superior material for sliding door plantation shutters due to its inherent strength, lightness, its natural synergy and aesthetic qualities. DIYShutters Wood shutters do not warp or crack because the timber is ‘engineered’ to be stronger and straighter, solid, kiln dried and sealed.

Solutions for Ultra-Wide Sliding Stacker or Patio Doors

  • Unique Panel Construction: For exceptionally wide patio doors, DIYShutters offers a unique panel design that incorporates a discreet center mullion (metal strip) to divide what would otherwise be a very wide louvre length.
  • Preserved Elegance: This design maintains a minimalist and elegant look while preserving the view.
  • Single-Piece Construction: Panels up to 1.5 meters wide can be constructed as a single piece. The vertical mullion supports the louvres. The head board carries the panels which are light.
  • Reduced Panel Count: This allows for covering wide openings with fewer panels (e.g., two 1.5-meter panels for a 3-meter door, or three 1.5-meter panels for up to 4.5 meters). This is  a practical impossibility with PVC.
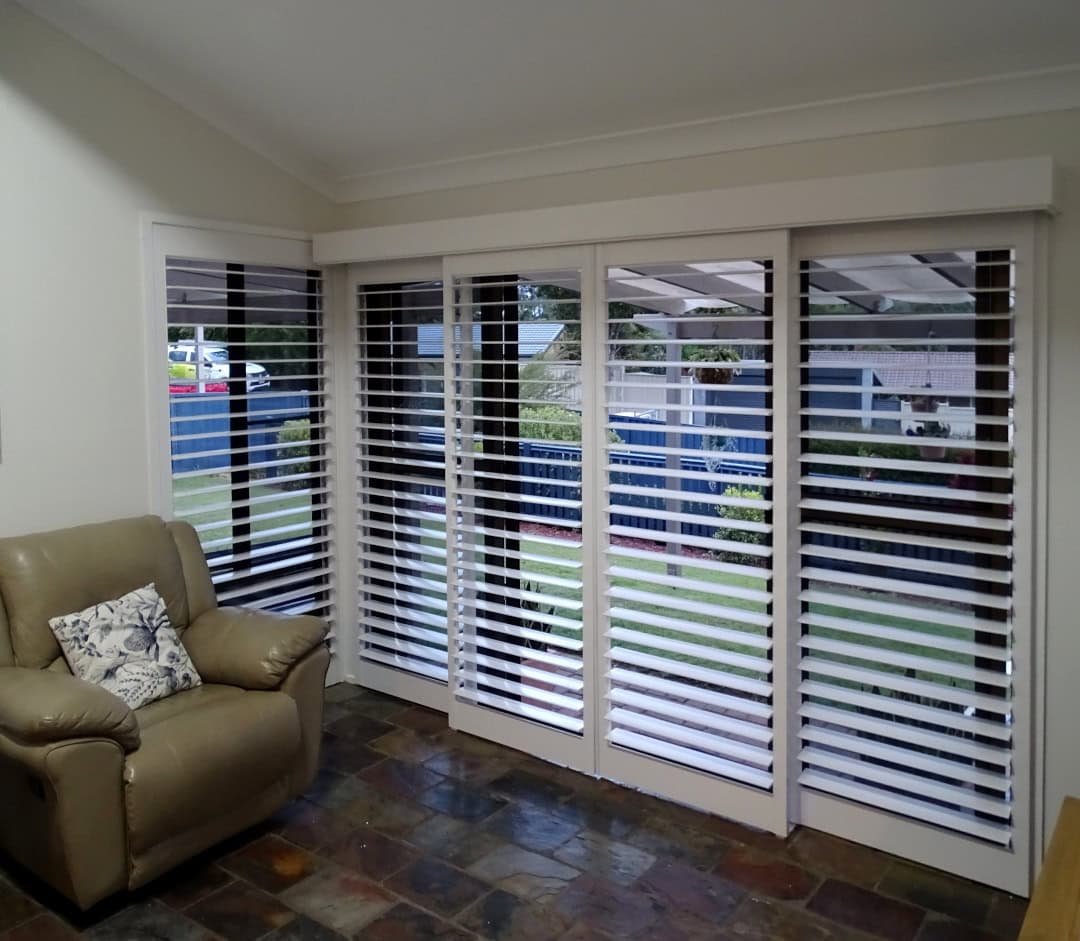
Large Ultra Wide Mullion Shutter Door with Custom Pelmet
Patio Door

Custom Configurations for Various Patio Door Openings

  • Four-Panel Systems (e.g., 4-meter wide glass doorways):
    • When glass door panels open from the center (like Stegbar’s SD04 configuration), a two-track overhead system can accommodate four shutter panels (two at the rear, two at the front and in the centre).
    • Access is achieved by sliding either of the center panels to the side, then moving through the glass “stacker” or sliding doors leading out to the patio
  • Ultra-Wide Stacker Systems (> 4.5 meters):
    • For very wide glass door stacker systems or when maximum view is desired, a floor track is utilized.
    • This is necessary when panels need to stack back significantly to either side (e.g., three panels stacking left, three right), requiring multiple overhead tracks and extended panel movement.

Installation of a plantation shutter sliding door system in just one hour

The DIYShutters plantation shutter sliding door system stands out for its simple three-part design and straightforward installation, usually completed in 1–2 hours for a typical home patio or sliding door. Here’s how to install one in your home:

System Components

Your system will arrive ready to assemble and includes:

The Head Board is key - just 6 screws to the underside of the reveal to install it.  Then the Panels just drop into the carriers. Guide fins are glued or screwed to the floor and the Pelmet just sits over the top of the Head Board, and is held by 4 screws. In one hour it's done!

Head Board and Pelmet for sliding shutter door system

Step-By-Step Installation

1. Unpack and Check Components

  • Ensure you have all the parts: headboard (with carriers and end stops already inserted into the track ,the shutter panels (or shutter kits), pelmet (with returns if ordered), fixings, and fins.

2. Attach the Headboard

  • Position the headboard centrally within the reveal (the inside face) of the patio or sliding door opening.
  • Securely screw the headboard into place, ensuring it is level. Use spacers to ensure the headboard is level with the floor.

3. Hang the Shutter Panels

  • Carefully hook each panel onto its carrier, which should easily glide along the track.
  • Check the panel-to-floor clearance; with 7 to 10 mm (ensuring a 3 mm minimum clearance from the fins).

5. Secure Fins to the Floor

  • Mount the fins to the floor in the centre of the opening, then align them with the centre line of the overhead tracks. These fins will go beneath the shutter panels to help guide and stabilise the panels as they slide.
  • Check that the fins are clear of the bottom of the panel by 3 to 5 mm throughout the travel range.

6. Fit the Pelmet

  • Attach the pelmet to the front of the headboard to conceal the track system.
  • If your pelmet comes with side returns, simply push them over the dove-tail joiners on the front pelmet strip for a neat finish. Tap carefully.
  • Typically, a Pelmet overlaps an adjacent wall by about 50 mm on each side. If an architrave is present, the overlap of the pelmet would be just clear of the architrave by 5 mm plus the pelmet return’s thickness (22 mm) clear of the architrave.

7. Add Optional Light Block Strips

  • If light block strips (LBS) have been included in your order, fix these to the edges of the shutter panels to further reduce light bleed. Fix one LBS to the architrave.

8. Install End Stops

  • Position and secure the end stops to limit each panel’s travel, preventing it from sliding too far in either direction. Typically, panels overlap the wall or architrave by 20 mm. The stops also control your chosen configuration.

9. Final Adjustments and Clean Up

  • Test the sliding action of the panels several times.
  • Adjust end stops and check for smooth movement.
  • Wipe down all surfaces for a professional look.

That’s it! Your plantation shutter sliding doors system is now fully installed. This DIYShutters system is designed for simplicity and a polished, custom-fitted appearance.

Not what you were looking for?
— Shutters out of your budget? Keep in mind DIYShutters also supplies Roller Blinds, Panel Glides and Curtains at better-than-internet prices, such as from www.diyblinds.com.au, which has much bigger selling Budgets and overheads than us. Contact us and tell us what you want. —